What to prepare before, during and after a drilling project
At face value, well drilling projects sound as simple as showing up and digging a deep hole in the ground. But it’s important to learn more about how to drill a water well because it isn’t that straightforward. Preparing for a drilling project is more than just setting up the rig. In fact, drill site preparation starts before you arrive at the jobsite and details adjust throughout the project. So, where do you start?
Before You Go
Make sure you have all the tools you need to ensure your water well project runs smoothly. Lone Star Drills offers a mobilization checklist with an overview of what items you might need throughout the drilling process. This checklist is a great resource when preparing for a project and deciding what to take to a drilling site.

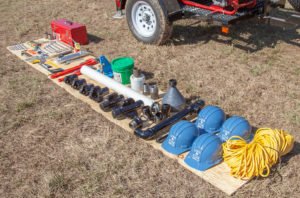
If you’re looking for a comprehensive kit with basic necessities to keep your water well project running smoothly, we offer the water well drill kit. This kit, also called the missionary kit, includes:
- 4-inch casing flush tool
- 4-inch casting slips
- 1/4-inch hollow braid rope
- Hoist bracket bailer tripod assemblies
- PVC bailer
- Hard hats
- A toolbox — pipe joint compound, grease gun, wrenches, nuts and bolts
Once you have all the tools you’ll need, it’s time to set up a detailed logbook to record information about the drilling process. A drilling logbook allows you to record the location of the jobsite, weather conditions, soil conditions and more. The presence of a logbook onsite reminds the drilling team to pay attention to soil conditions and drilling mud throughout the process. Failure to pay attention to these aspects of the project can lead to borehole collapse, which often requires a new borehole to be started.
When you arrive at the jobsite, record the borehole location as well as a description of the soil where you are drilling. Your drilling team will use this document to track how long the rig is drilling, what changes are seen in both the soil and the cuttings, and to note changes in the soil. The drilling log prepares crews to adjust the drilling mud and recognize when an aquifer has been tapped. Setting this up before you go means the crew will be prepared to document the project and make adjustments as you drill.
At the Jobsite
The first responsibility after you arrive at the jobsite is to set up the water well drilling area. Rope off the area with enough room for the crew to easily move around the drill. This keeps the area clearly marked and prevents onlookers from getting too close to the drill rig while digging is in progress.
Once the site is marked, it’s time to unload. Find dry, even ground to set up the tools and equipment. Then, position four 55-gallon drums near the drill site and fill each with water. This is where you will mix the drilling mud (bentonite or polymer) and fill the pits. Five feet away from the drums, dig two pits: one settling pit and one suction pit. These pits are essential in keeping mud clean and collecting the cuttings created throughout the drilling process. The pits should be large enough to hold three times the volume of the borehole you’re about to drill. If the soil is sandy, these pits might need to be lined with plastic to protect the water from sand contamination and from soaking into the ground. Then, dig a 6-inch-deep channel from the well guide hole to the first pit. Once that’s ready, it’s time to set up the drill. Refer to your operator’s manual or our YouTube page for instructions for your drill model.
Preparing for the Next Project
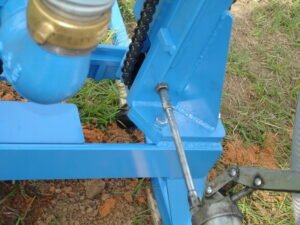
 Site preparation and organization is easier if equipment is well maintained. First, keep an eye on grease points to make sure everything is well lubricated and continues running smoothly. After every eight hours of operation, apply grease that contains molybdenum to lubricate each of the four grease bolts on the drill. Apply grease through the grease fittings which are accessible from the mast. The drill pipe threads should also be lubricated with pipe joint compound. Finally, wash down the drill mast base before storing the rig. These steps will help in the long run by preparing your equipment for the next project. You’ll save time when you get to the next jobsite by staying a step ahead.
Learn more about how to drill a water well, including site preparation, maintenance and troubleshooting, on our Lone Star Drills YouTube channel or contact us today.